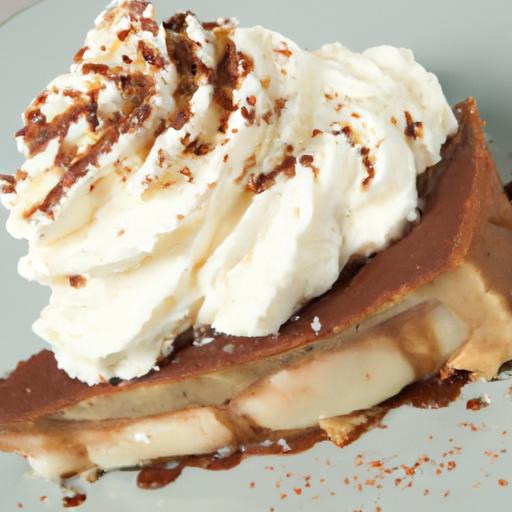
There are few desserts as delightfully indulgent as banoffee pie-a luscious marriage of rich bananas, sticky toffee, and velvety cream all nestled atop a buttery biscuit base. This quintessentially British treat has won hearts and taste buds around the world, combining simple ingredients into a symphony of sweetness that feels like a warm hug on a plate.But how do you transform these humble components into the perfect banoffee pie, with just the right balance of textures and flavors? In this sweet classic guide, we’ll unravel the secrets and step-by-step techniques that elevate your banoffee pie from good to unforgettable, ensuring every slice is a slice of pure bliss.
How to Make the Perfect Banoffee Pie starts with selecting the finest ingredients to balance rich sweetness and creamy textures. This beloved British dessert combines luscious caramel, fresh bananas, crunchy biscuit base, and fluffy whipped cream into an irresistible treat. From sourcing buttery biscuits to mastering the golden caramel, every detail matters to create that iconic harmony of flavors and textures.
Prep and Cook Time
- Planning: 20 minutes
- Chilling: 2 hours
- Total Time: 2 hours 20 minutes
Yield
- Serves: 8 generous slices
Difficulty Level
- Easy – Perfect for bakers of all levels
Ingredients
- For the Biscuit Base:
- 250g digestive biscuits (roughly 2 cups), crushed finely
- 120g unsalted butter, melted
- For the Caramel Layer:
- 1 can (395g) sweetened condensed milk (for homemade caramel, see tips)
- 2 tbsp unsalted butter, softened
- 1 tbsp golden syrup or light corn syrup
- For the Topping:
- 3 large ripe bananas, peeled and sliced
- 300ml heavy whipping cream (chilled)
- 2 tbsp icing sugar, sifted
- 1 tsp pure vanilla extract
- Garnishes (optional): dark chocolate shavings, cacao powder, or crushed nuts
Instructions
- Crafting the Perfect biscuit Base: In a food processor or with a rolling pin, crush digestive biscuits into fine crumbs. transfer to a bowl and mix in melted butter until well combined. Press the mixture firmly and evenly into a 9-inch loose-bottom tart tin to form a compact base. Chill in the fridge while preparing the caramel.
- Mastering the Caramel Layer: To ensure the ideal sweet and creamy texture, use canned sweetened condensed milk. Heat the unopened can in simmering water for 2 hours to transform it into dulce de leche – the rich caramel layer. Alternatively, blend the condensed milk with softened butter and golden syrup in a saucepan over low heat, stirring constantly until thick and smooth. Spread this luscious caramel evenly over the chilled biscuit base and return to the fridge to set for at least 1 hour.
- Layering the Bananas: Once the caramel is set and slightly firm, arrange sliced ripe bananas evenly on top. Choose bananas that are fragrant and slightly spotty for sweetness and softness to complement the buttery biscuit and caramel.
- Achieving the dreamy Whipped Cream Finish: Using a chilled metal bowl and whisk or electric mixer, whip heavy cream with icing sugar and vanilla extract until soft peaks form. Take care not to overwhip – the cream should be light,smooth,and airy. Delicately spoon or pipe the whipped cream over the layer of bananas, creating soft swirls or peaks for visual appeal.
- Final Touches: For an added touch, sprinkle with dark chocolate shavings, a dusting of cacao powder, or a handful of crushed nuts to provide contrast in texture and color, enhancing the indulgent look of your Banoffee Pie.
- Chill the finished pie for at least 30 minutes before serving to let flavors meld beautifully.
Tips for Success
- Use fresh, ripe bananas that are soft enough to melt into the caramel but still firm to hold their shape.
- The biscuit base can be made with graham crackers or any buttery,semi-sweet biscuit if digestives aren’t available.
- For a homemade caramel option,heat sweetened condensed milk slowly in a double boiler; avoid direct heat to prevent burning.
- Chill your cream bowl and whisk before whipping to get fluffier, more stable peaks.
- Banoffee Pie can be assembled a day ahead and kept refrigerated-just add whipped cream and garnish shortly before serving.
Serving Suggestions
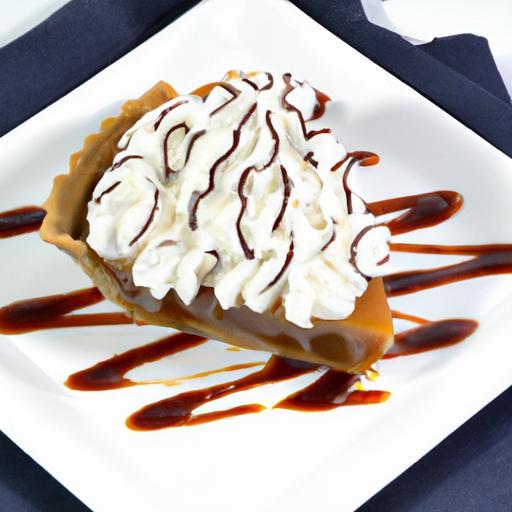
Slice with a warm, wet knife to get clean edges. Serve chilled on a simple white plate to let the golden caramel and creamy topping shine. Pair with a hot cup of strong black coffee or a smooth caramel latte for the perfect afternoon treat. Garnish slices individually with a few extra banana slices or a drizzle of chocolate sauce for a decadent finish. This classic dessert also pairs wonderfully with fresh berries or a light dusting of cinnamon for a subtle spice contrast.
| Nutrient | per Serving |
|---|---|
| Calories | 405 kcal |
| Protein | 4 g |
| Carbohydrates | 52 g |
| Fat | 20 g |

Discover more dessert inspiration in our Ultimate Caramel Desserts guide.For a deeper dive into traditional British sweets and history, visit the BBC Good Food Banoffee Pie recipe page.
Q&A
Q&A: How to Make the Perfect Banoffee Pie – A Sweet Classic Guide
Q1: what exactly is banoffee Pie?
A: Banoffee Pie is a luscious British dessert that combines the creamy richness of toffee, the freshness of bananas, and a buttery biscuit base, all crowned with whipped cream. It’s a symphony of textures and flavors that’s sweet, comforting, and simply irresistible.
Q2: What are the key ingredients for making a traditional Banoffee pie?
A: The magic starts with a crunchy biscuit base (usually digestive biscuits or graham crackers), homemade or store-bought dulce de leche (a thick, caramel-like toffee), ripe bananas, fresh whipped cream, and sometimes a sprinkle of cinnamon or grated chocolate to finish.
Q3: Can I make the toffee (dulce de leche) from scratch?
A: Absolutely! The classic way is to simmer a can of sweetened condensed milk slowly until it caramelizes into smooth, golden toffee. it takes patience but rewards you with the creamiest, most authentic flavor.Alternatively, pre-made dulce de leche works perfectly if your in a hurry.
Q4: How do I ensure the biscuit base is perfectly crisp?
A: Crush your biscuits finely and mix them thoroughly with melted butter to bind. Press the mixture firmly and evenly into your pie dish, then chill it before adding fillings. This helps the base set firmly, giving you that satisfying crunch with every bite.
Q5: What’s the best way to slice the bananas without them browning?
A: Use ripe but firm bananas for optimal flavor and texture. To slow browning, toss the sliced bananas briefly in a splash of lemon juice or brush them gently with citrus juice before layering them atop the toffee.
Q6: How thick should the toffee layer be?
A: Generosity is key! Spread a thick,even layer of toffee-about a half to one centimeter-to guarantee that rich caramel flavor in every forkful. Just be careful not to overload; you want a balanced bite of biscuit, toffee, banana, and cream.
Q7: What’s the secret to perfectly whipped cream for Banoffee Pie?
A: Use chilled heavy cream and a clean bowl. Whip at medium speed until soft peaks form-light and airy, but not too stiff. Sweeten lightly with powdered sugar or a touch of vanilla extract, so it complements without overpowering the other flavors.
Q8: Can I add any extra toppings to customize my Banoffee Pie?
A: Definitely! A dusting of cocoa powder, a sprinkle of grated dark chocolate, chopped nuts, or even a drizzle of espresso can elevate the classic recipe into your very own signature masterpiece.
Q9: How should Banoffee pie be stored?
A: Keep it refrigerated and covered to maintain freshness. It’s best enjoyed within 2-3 days, as the bananas can start to soften and the biscuit base might lose some crunch.for the perfect daytime treat, take it out of the fridge about 15 minutes before serving.
Q10: What’s the best occasion to serve Banoffee Pie?
A: Any occasion that calls for indulgence! From family dinners to celebrations or a cozy teatime treat, Banoffee Pie’s sweet charm makes it a crowd-pleaser that’s both comforting and notable.
With these insights, you’re all set to bake a Banoffee Pie that’s as delightful as the classic British favorite-rich, creamy, and sweetly unforgettable. Happy baking!
Final Thoughts
Whether you’re a seasoned baker or a curious newcomer, mastering the art of banoffee pie opens the door to a world where buttery biscuits, luscious caramel, fresh bananas, and fluffy cream come together in perfect harmony. This sweet classic isn’t just a dessert-it’s a timeless celebration of simple ingredients transformed into something exceptional. So next time you crave a slice of indulgence, remember that with a little patience and these tried-and-true steps, the perfect banoffee pie is always within reach. Happy baking, and even happier tasting!