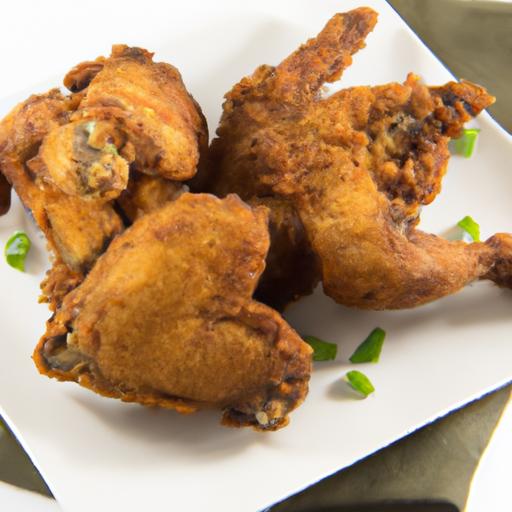

There’s something undeniably magical about biting into a piece of perfectly fried chicken-its golden,crispy crust giving way to juicy,tender meat beneath. But for those navigating a gluten-free lifestyle, achieving that quintessential crunch without compromising flavor can feel like an elusive quest. Fear not! Whether you’re a dedicated gluten-free foodie or simply seeking a healthier twist on a classic comfort dish,this ultimate fried chicken guide is here to transform your cooking game. from the best gluten-free coatings to secret techniques that lock in moisture and deliver maximum crispiness, get ready to embark on a mouthwatering journey where crunch meets clean eating in the best possible way.
Choosing the Perfect Gluten-Free Flours for Crunchy Coating
Crispy & Gluten-Free fried chicken begins with selecting flours that not only ensure safety but deliver that coveted crunch and golden hue. Unlike traditional all-purpose flour, gluten-free options bring unique textures and flavors that can elevate your coating to irresistible levels. Rice flour is a superstar here,prized for producing a light,crisp shell that shatters delightfully with each bite.Combining rice flour with cornstarch amplifies crispness, offering a delicate crumb with zero heaviness.
For a slightly nuttier profile, almond flour adds depth and moisture retention, making it perfect when balanced with lighter flours to avoid clumping. Another champion is tapioca starch, which lends a subtle chewiness and flexibility, ensuring that the crust isn’t brittle or prone to flaking off too quickly. Blending these flours in a ratio tailored to your taste can transform your crunchy coating from good to unforgettable.
Mastering the Marinade for Juicy and Flavorful Chicken
The secret to juicy, tasty gluten-free fried chicken lies beyond the coating-it’s in the marinade’s magic. A well-crafted marinade tenderizes while infusing deep flavors that bite through the crunch and linger pleasantly. A buttermilk-based marinade (using cultured dairy or a dairy-free substitute) is a classic starting point; the mild acidity gently breaks down proteins, creating succulent meat.
Elevate your marinade by adding garlic, onion powder, , and a touch of cayenne pepper for balanced heat. Don’t forget a generous pinch of salt to draw out flavor and retain moisture during cooking. For those maintaining dairy-free status, a mix of coconut yogurt and lemon juice works wonders for tang and tenderizing power. Marinate your chicken for at least 4 hours, preferably overnight, ensuring every bite bursts with juicy, well-rounded richness beneath the crispy coat.
Techniques to Achieve the Ultimate Crispy Texture every Time
Achieving that iconic, crunchy texture requires a few strategic techniques matched with the perfect gluten-free coating. After marinating, pat your chicken dry to remove excess moisture before dredging. This step prevents sogginess and promotes better adhesion of the flour blend. For the dredge, double-dipping-first into the seasoned flour mixture, than back into the marinade or an egg wash, and again into flour-creates layers of crunch that bake into a phenomenal crunch.
Allow the coated chicken to rest on a wire rack for 10-15 minutes before frying; this helps the flour adhere firmly, reducing the chance of patchy spots. When frying, temperature control is crucial: maintaining oil around 350°F (175°C) cooks the chicken evenly and crisps the crust without absorbing excess grease. Avoid overcrowding your fryer or pan to preserve oil temperature and maximize crispiness.
Essential Tips for Safe and Tasty gluten-Free Frying
Frying gluten-free chicken safely while keeping it delicious requires both attention and care. Use a neutral oil with a high smoke point such as avocado, refined sunflower, or grapeseed oil to avoid off-flavors and ensure clean frying.Monitor oil temperature with a reliable thermometer to prevent burning the coating or undercooking the meat.
To prevent cross-contamination, dedicate separate utensils and bowls for gluten-free preparation, and always strain or refresh frying oil to keep flavors pure.For a lighter alternative, finish fried chicken on a wire rack in a warm oven to wick away excess oil without sacrificing crunch. rest the chicken briefly after frying-this allows residual heat to finish crisping and redistributes juices inside for the perfect bite every time.
Prep and Cook Time
- Prep Time: 20 minutes (plus 4-12 hours marinating)
- Cook Time: 15-20 minutes per batch
Yield
- Serves 4 hungry crispy chicken lovers
Difficulty Level
- Medium-requires patience and attention to frying techniques
Ingredients
- 4 lbs chicken pieces (drumsticks, thighs, or breasts, skin-on)
- 2 cups buttermilk (or coconut yogurt + 2 tbsp lemon juice)
- 2 tsp kosher salt
- 1 tbsp smoked paprika
- 1 tsp cayenne pepper
- 1 tsp garlic powder
- 1 tsp onion powder
- 1 cup rice flour
- ½ cup cornstarch
- ½ cup almond flour
- ¼ cup tapioca starch
- 1 tbsp baking powder
- Vegetable oil for frying
- Fresh herbs (optional, for garnish)
Instructions
- Prepare the marinade: In a large bowl, whisk together buttermilk (or dairy-free substitute), 1 tsp salt, smoked paprika, cayenne, garlic powder, and onion powder.
- Marinate the chicken: Submerge chicken pieces fully, cover, and refrigerate for 4 to 12 hours for best results.
- Mix the dry coating: In a separate large bowl, sift together rice flour, cornstarch, almond flour, tapioca starch, baking powder, and remaining salt.
- Drain and dry: Remove chicken from marinade, letting excess drip off, then gently pat dry with paper towels to enhance flour adhesion.
- Dredge the chicken: Dip each piece into the dry mix, back into the marinade or egg wash, then a final coating of the flour mixture, pressing lightly to adhere.
- Rest coated chicken: Place pieces on a wire rack for 10-15 minutes to set the crust before frying.
- Heat the oil: Fill a deep skillet or fryer with 2-3 inches of oil and heat to 350°F (175°C). Use a candy or deep-fry thermometer to monitor temperature.
- fry in batches: Carefully lower chicken pieces into the hot oil without overcrowding.Fry for 15-20 minutes,turning occasionally,until crust is golden brown and internal temperature reaches 165°F (75°C).
- Drain and rest: Transfer fried chicken to a wire rack set over a baking sheet to drain excess oil and keep crust crisp.
- serve immediately garnished with fresh herbs for a burst of color and aroma.
Chef’s Notes
- Flour blends: Feel free to experiment by swapping almond flour for chickpea flour for a different nuttiness and protein boost.
- Marinating time: The longer the chicken marinates, the juicier and more flavorful it becomes-overnight is ideal.
- Oil temperature: Keep a steady 350°F to avoid greasy or burnt coating-adjust heat as necessary between batches.
- Make-ahead: You can prep and coat your chicken the night before; keep refrigerated and fry fresh for optimal crunch.
- Safety tip: Use separate utensils when handling raw chicken and gluten-free flours to prevent cross-contamination.
Serving Suggestions
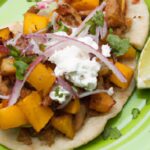
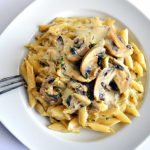
Present your crispy gluten-free fried chicken with rustic sides like creamy mashed potatoes or a luminous, crunchy slaw tossed in vinegar and fresh herbs. A squeeze of lemon enhances the smokey, spicy coating, while a drizzle of honey-mustard sauce adds a subtle sweet contrast. Garnish generously with fresh parsley or chives for color and freshness. Pair with a crisp iced tea or sparkling lemonade to balance the richness and enjoy a perfectly rounded meal.

| Nutrient | Per Serving |
|---|---|
| Calories | 420 kcal |
| Protein | 35 g |
| Carbohydrates | 15 g |
| Fat | 22 g |
For further insights on gluten-free frying techniques, visit Celiac Disease Foundation.
Q&A
Q&A: Crispy & Gluten-Free – The Ultimate Fried Chicken Guide
Q1: Can fried chicken really be gluten-free and still be crispy?
A1: Absolutely! Achieving that iconic crunch without gluten is all about the right flour blends and moisture control. Gluten-free flours like rice flour, chickpea flour, or even a specialized gluten-free baking mix create a light, crisp coating that rivals traditional wheat flour.Pair these with cornstarch or arrowroot powder for extra crispness. The secret lies in layering-dredging the chicken in a seasoned flour mix,then dipping it in a wet batter or egg wash,and finally a second coat of dry mix.
Q2: What are the best gluten-free flours or starches to use for frying?
A2: Rice flour and cornstarch are your crispy champions-they fry up beautifully and produce a delicate crunch. Chickpea flour adds a nutty flavor and great texture, while potato starch and arrowroot powder deliver lightness and crisp texture. Combining a few of these can balance flavor and crunch perfectly.
Q3: How can I make sure my gluten-free fried chicken stays juicy inside?
A3: Brining or marinating the chicken before frying locks in moisture and enhances flavor.A simple brine of water, salt, and a touch of sugar or spices dose wonders.Also, maintaining the right oil temperature-usually between 325°F and 350°F-is crucial; too hot, and the crust burns before the inside cooks, too cool and the chicken soaks up oil and becomes greasy.
Q4: What spices and seasoning work best for gluten-free fried chicken?
A4: Classic southern-inspired seasonings like paprika,garlic powder,onion powder,black pepper,and cayenne give your chicken that familiar kick. Fresh herbs like thyme or rosemary can be added to the flour mix for aromatic depth.Don’t be afraid to experiment with smoked paprika or ground mustard for a flavor twist.
Q5: Are there any special equipment tips to get that perfect fry?
A5: A heavy,deep pan or a dedicated deep fryer helps maintain even oil temperature. Use a thermometer to monitor the heat precisely. A wire rack placed over a baking sheet is perfect for draining fried chicken-this prevents sogginess by letting air circulate around the pieces, ensuring the crust stays crisp as it cools.
Q6: Can I make gluten-free fried chicken ahead of time or freeze it?
A6: Yes! After frying, let the chicken cool on a wire rack. For storage, refrigerate in an airtight container for up to 3 days. To reheat, use an oven or air fryer to revive the crunch rather than the microwave. for freezing, flash freeze the fried chicken pieces on a tray, then transfer to freezer bags for up to 3 months. Reheat thoroughly before serving.
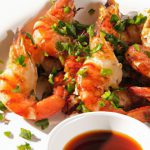
Q7: What’s a tasty dipping sauce that complements gluten-free fried chicken?
A7: Classic honey mustard or a spicy sriracha mayo elevate the flavor game beautifully. For a creamy contrast, try an herbed ranch made with dairy or dairy-free yogurt, packed with fresh parsley, dill, and chives. Tangy barbecue sauce (made gluten-free) pairs perfectly too, providing sweet and smoky notes that balance the crispy chicken.
Q8: Can gluten-free fried chicken be baked instead of fried to reduce oil use?
A8: Baking is an option, but it won’t perfectly replicate the deep-fried crunch. For best results, bake the coated chicken on a wire rack at high heat (425°F) with a light spray of oil. This method yields a crispy outer layer that’s less oily but still satisfies those fried chicken cravings.
Ready to toss on your apron and crunch into gluten-free golden goodness? With these tips and tricks,gluten-free fried chicken can be your new signature dish-crispy,juicy,and utterly irresistible!
Wrapping Up
Whether you’re a seasoned gluten-free foodie or a curious crisp-craver,mastering the art of gluten-free fried chicken is more than just a recipe-it’s a celebration of flavor,texture,and culinary creativity. With the right ingredients and techniques, you can achieve that golden, crunchy perfection without sacrificing taste or comfort. So go ahead, whip out your favorite gluten-free flours, experiment with spices, and dive into the satisfying world of crispy delights. Your ultimate fried chicken adventure awaits, proving that gluten-free can be just as indulgent, if not more. Happy frying!