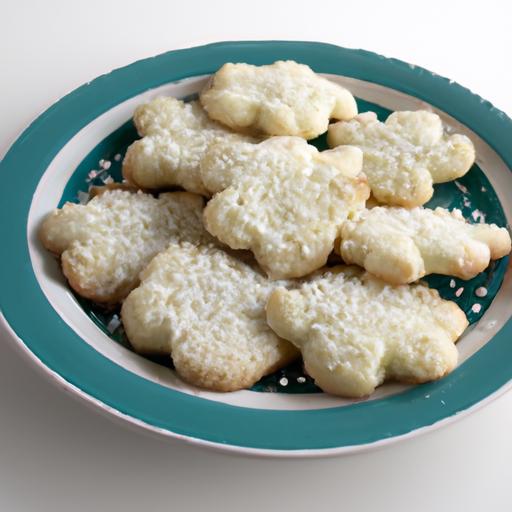
Ther’s something truly magical about perfectly shaped,beautifully decorated sugar cookies - a sweet canvas just waiting for your creativity to shine. Whether you’re preparing for a festive holiday, a birthday party, or simply craving a delightful treat, mastering the art of cut-out sugar cookies is a skill worth having in your baking repertoire.In this article, we’ll take you through an easy, step-by-step recipe that guarantees tender, buttery cookies with crisp edges and a smooth surface ideal for decorating. Get ready to roll up your sleeves and create cookie masterpieces that look as good as they taste!
Perfect Cut-Out sugar Cookies offer an irresistible blend of buttery richness and crisp texture, ideal for celebrating any season or special occasion. Rooted in centuries-old traditions of festive baking, these delightful treats have evolved into an art form-where precision, creativity, and high-quality ingredients transform simple dough into edible masterpieces. Whether you’re a seasoned baker or a first-timer, mastering the nuances of ingredient selection, dough preparation, and flawless decorating will elevate your cookie game and ensure every batch is a showstopper.
Prep and Cook Time
- Preparation: 25 minutes
- Chilling Time: 1 hour
- Baking Time: 8-10 minutes per batch
- Total Time: Approximately 1 hour 40 minutes
Yield
About 24 medium-sized cookies, depending on cookie cutter size
Difficulty Level
Easy to Medium – Perfect for home bakers ready to impress with beautiful, tidy cookies
Ingredients
- 2 ¾ cups all-purpose flour, sifted
- 1 teaspoon baking powder
- ½ teaspoon fine sea salt
- 1 cup unsalted butter, softened to room temperature
- 1 ½ cups granulated sugar
- 1 large egg, room temperature
- 2 teaspoons pure vanilla extract
- 1 tablespoon whole milk or heavy cream (optional, for extra tenderness)
Instructions
- Mix Dry Ingredients: In a medium bowl, whisk together the flour, baking powder, and salt. Set aside.
- Cream Butter and Sugar: Using a hand or stand mixer fitted with a paddle attachment, beat the butter and sugar on medium speed until light, fluffy, and pale, roughly 3-4 minutes.
- Add Egg and Vanilla: Beat in the egg and vanilla extract until fully combined.
- Incorporate Dry Ingredients: Gradually add the flour mixture, mixing on low speed. Pause to scrape down the bowl, mixing until the dough begins to come together. For a slightly softer dough, add the milk or cream now; be careful not to overmix.
- Chill the Dough: Divide the dough into two equal disks, wrap each tightly in plastic, and refrigerate for at least 1 hour. Chilling solidifies the butter, making rolling easier and preventing excessive spreading during baking.
- Prepare for Rolling: Lightly flour your rolling surface and rolling pin. Remove one disk of chilled dough and let it sit briefly at room temperature for about 5 minutes – this prevents cracking while rolling.
- Roll Out Dough: Roll the dough to an even thickness of about ¼ inch for the perfect balance of crisp edges and tender center. Rotate the dough frequently and add light flour as needed to prevent sticking, avoiding overflouring which can toughen the dough.
- Cut Out Shapes: Use your favorite cookie cutters, pressing straight down with even pressure. Avoid twisting cutters to keep edges sharp and clean.Transfer shapes carefully to a parchment-lined baking sheet using a thin spatula.
- Bake to Perfection: Bake in a preheated 350°F (175°C) oven for 8-10 minutes. Watch carefully: edges should turn just golden while centers remain pale. Overbaking dulls the delicate texture and flavor.
- Cool Completely: Allow cookies to cool on the baking sheet for 5 minutes before transferring to a wire rack. complete cooling is essential for decorating with icing to prevent melting or sliding.
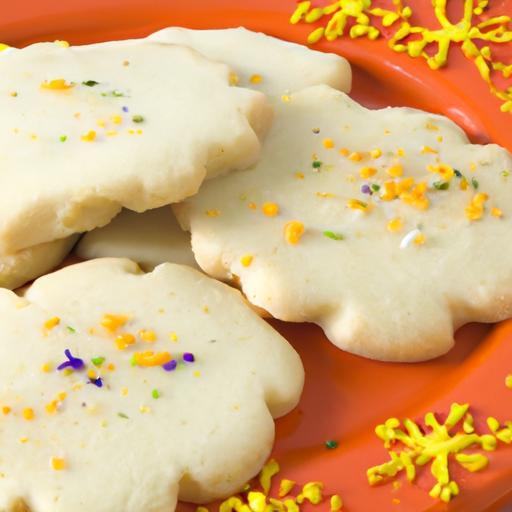
- Decorate Creatively: Frost with royal icing or buttercream,using piping bags fitted with fine tips for intricate designs.Sprinkle with colored sugars, edible glitter, or carefully placed candy pearls to elevate aesthetics.
Tips for Success
- Ingredient Quality: use real vanilla extract and unsalted butter for clean, authentic flavor. Avoid margarine or substitutes that affect texture.
- Dough chilling: Never skip chilling. It minimizes spreading,enhances flavor progress,and ensures smooth rolling.
- Rolling Technique: Roll the dough between two sheets of parchment paper for easier handling and less flour incorporated, resulting in tender cookies.
- Storage: Store baked cookies in an airtight container at room temperature for up to one week. For longer life, freeze unbaked dough discs tightly wrapped or frozen baked cookies layered with parchment paper.
- Decorating Variations: Experiment with natural food colorings like beet powder or matcha for vibrant hues without artificial dyes.
- Troubleshooting: If dough cracks while rolling, warm it in your hands for a few seconds or let it rest slightly at room temperature before continuing.
Serving Suggestions
Arrange these charming cut-out sugar cookies on a decorative platter lined with a lace doily for festive gatherings. Pair them with a warm cup of spiced chai, herbal tea, or a glass of cold milk. Garnish iced cookies with a delicate dusting of powdered sugar or edible gold leaf for a luxurious touch.These cookies also make delightful gifts when tied individually with ribbon and tagged with personalized messages.

| Nutrient | Per Cookie (approx.) |
|---|---|
| calories | 120 kcal |
| Protein | 1 gram |
| Carbohydrates | 18 grams |
| Fat | 5 grams |
For more appetizing baking inspiration, discover our vanilla buttercream frosting recipe that pairs perfectly with these sugar cookies. for detailed food safety on egg handling, visit the USDA Food Safety and inspection Service.
Q&A
Q&A: Perfect Cut-Out sugar Cookies - Easy Step-by-Step Recipe
Q1: What makes cut-out sugar cookies different from regular sugar cookies?
A1: Cut-out sugar cookies are all about shape and structure. Unlike drop cookies that spread unpredictably, cut-out cookies hold their shape crisply, allowing you to create charming designs with cookie cutters. This calls for a dough that’s firm yet tender-perfect for decorating!
Q2: How do I ensure my cut-out cookies don’t lose their shape while baking?
A2: The secret is chilling the dough thoroughly before rolling it out. Cold dough is less sticky and spreads less during baking.Also, avoid rolling the dough too thin-about 1/4 inch thick usually works best. Baking on a cool cookie sheet can help as well,so consider baking one sheet at a time.
Q3: Can I make the dough ahead of time?
A3: Absolutely! In fact, chilling the dough overnight enhances flavor and texture.Store it wrapped tightly in plastic wrap in the refrigerator. When ready to bake, let it warm up just enough to roll-about 10-15 minutes outside the fridge.
Q4: What’s the best icing for decorating cut-out sugar cookies?
A4: Royal icing is a classic choice because it dries hard and smooth, ideal for detailed designs.It’s made from powdered sugar, meringue powder or egg whites, and water. For a softer alternative, a thick glaze made from powdered sugar and milk can work, but it won’t offer the same crisp finish.
Q5: How can I prevent my cookies from sticking to the rollers or cutters?
A5: Dust your surface and rolling pin lightly with flour or powdered sugar to keep dough from sticking. For intricate cutters, dip them in flour or chill them slightly before cutting. Working with chilled dough also helps minimize sticking.
Q6: Is it possible to make this recipe gluten-free without losing texture?
A6: Yes! Use a gluten-free all-purpose flour blend designed for baking, and add a touch of xanthan gum if your blend doesn’t already contain it. This ensures your cookies stay tender but hold their cut-out shapes beautifully.
Q7: What’s the best way to store decorated cut-out sugar cookies?
A7: Let the icing dry completely-usually a few hours to overnight-than store cookies in an airtight container at room temperature. If they’re stacked, place parchment or wax paper between layers to prevent sticking.Properly stored, they stay fresh for up to a week.
Q8: Can I add flavors to the dough without jeopardizing its structure?
A8: Yes! Vanilla extract is a staple, but you can also experiment with almond extract, lemon zest, or a splash of orange blossom water. Just be cautious not to add too much liquid, which could make the dough sticky and harder to work with.
Q9: What tools are essential for creating beautiful cut-out sugar cookies?
A9: Aside from your favorite cookie cutters, a rolling pin, a baking sheet lined with parchment paper, a cooling rack, and piping bags for icing are must-haves. Consider a bench scraper or offset spatula to lift cut shapes gently without distorting them.
Q10: How can I perfect the texture-crispy edges with a soft center?
A10: Bake just until the edges turn golden but the center looks slightly soft.oven temperatures vary, so start checking at the minimum suggested baking time. Cooling the cookies on the sheet for a few minutes before transferring helps set the perfect balance of crispness and chewiness.
With these answers, your journey to perfect cut-out sugar cookies becomes a joyous adventure-one delicious shape at a time!
To Wrap It Up
With these simple steps in hand, crafting perfect cut-out sugar cookies becomes not just a baking task, but a delightful creative adventure. Whether you’re preparing for a festive festivity or simply craving a sweet project, this recipe ensures your cookies will come out crisp, beautifully shaped, and irresistible every time. So gather your ingredients, dust off those cookie cutters, and let your kitchen transform into a fragrant workshop of edible art. Happy baking, and even happier nibbling!