Craving that perfect balance of tangy zest and irresistible sweetness, all wrapped in crispy, golden-brown chicken? Look no further-our ultimate easy sweet and sour chicken recipe is here too transform your kitchen into a flavor-packed haven. Whether you’re a seasoned home cook or just starting out, this recipe unveils a foolproof way to achieve restaurant-quality taste with minimal effort. Dive in as we break down the secrets behind this timeless dish, unlocking the perfect harmony of flavors and textures that will have everyone at the table asking for seconds. Get ready to savor every bite of homemade goodness!
The Ultimate Easy Sweet and Sour Chicken Recipe Unveiled
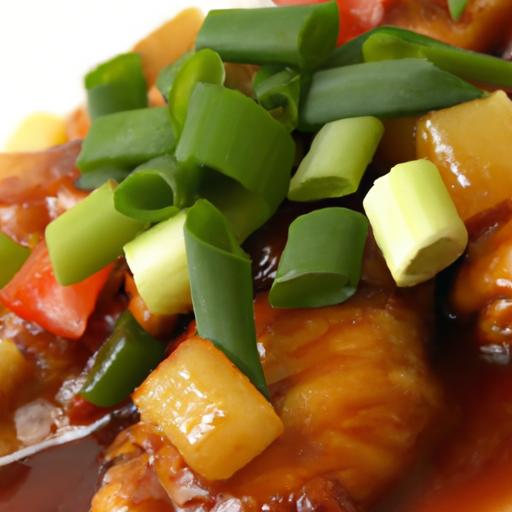
Delight your taste buds with the iconic flavors of The Ultimate Easy Sweet and Sour Chicken Recipe unveiled-an irresistible classic that blends tangy, sweet, and savory notes into one vibrant dish. This recipe has roots tracing back to Cantonese immigrant kitchens, evolving into a beloved staple worldwide. It’s my go-to anytime I crave that perfect harmony of crisp chicken enveloped in a glossy, flavor-packed sauce that dances on the palate.
Prep and Cook Time
- Preparation Time: 20 minutes
- Cooking Time: 25 minutes
- Total Time: 45 minutes
Yield
Serves 4 hearty portions
Difficulty Level
Easy – perfect for both beginners and seasoned home cooks
Ingredients
- For the Chicken:
- 1 lb boneless, skinless chicken thighs, cut into bite-sized pieces
- 1 cup all-purpose flour, sifted
- 1/2 cup cornstarch
- 1 teaspoon baking powder
- 1 large egg
- 3/4 cup cold water
- Salt and black pepper, to taste
- Vegetable oil, for frying
- For the Sweet and Sour Sauce:
- 1/2 cup pineapple juice (fresh or canned)
- 1/3 cup rice vinegar
- 1/4 cup ketchup
- 1/2 cup brown sugar, packed
- 2 tablespoons soy sauce (use tamari for gluten-free)
- 1 tablespoon cornstarch mixed with 3 tablespoons water (slurry)
- 1/2 cup diced bell peppers (red and green)
- 1/2 cup diced pineapple chunks
- 1 small carrot, thinly sliced
Instructions
- Prepare the batter: In a medium bowl, whisk together the all-purpose flour, cornstarch, baking powder, salt, and pepper. Crack in the egg and gradually add the cold water,stirring until the mixture forms a smooth,slightly thick batter. Keep chilled until ready to use.
- choose your chicken cuts wisely: Using boneless, skinless chicken thighs ensures tender, juicy bites that hold up beautifully during frying. Cut them into uniform 1-inch pieces for consistent cooking.
- Heat the oil: In a deep skillet or wok,heat vegetable oil to 350°F (175°C).A deep-frying thermometer helps maintain accurate temperature for crispiness without oil absorption.
- Coat the chicken: Dip each chicken piece into the batter, ensuring every side is fully covered. Let excess drip off to avoid clumps.
- Fry in batches: Gently lower battered chicken into hot oil. Fry for 5-6 minutes or until golden and crispy, turning occasionally for even color. Avoid overcrowding the pan to maintain oil temperature and crisp finish.
- Drain: Remove cooked chicken with a slotted spoon and place on a wire rack or paper towels to drain excess oil.
- Make the sauce: In a saucepan over medium heat, combine pineapple juice, rice vinegar, ketchup, brown sugar, and soy sauce. Stir gently and bring to a simmer.
- Thicken the sauce: Stir in the cornstarch slurry gradually,whisking continuously until the sauce thickens to a glossy,spoon-coating consistency. This usually takes about 2-3 minutes.
- Add vegetables and pineapple: Toss in diced bell peppers, carrot slices, and pineapple chunks. Simmer for another 3 minutes, allowing the vegetables to soften slightly but retain crunch.
- Combine and serve: Transfer fried chicken into the sauce pan and toss gently to coat every crispy piece in the luscious sweet and sour glaze.
Tips for Success
- Balance the sweet and tang: Adjust brown sugar and rice vinegar incrementally after tasting the sauce to suit your preferred harmony of flavors-add a splash of extra vinegar for tang, or a pinch more sugar for sweetness.
- Maintain oil temperature: Use a thermometer and fry in small batches to keep the oil at a steady 350°F, the key to achieving crisp crust without heavy oil absorption or sogginess.
- Gluten-free option: Substitute with a 1:1 gluten-free flour blend and use tamari instead of soy sauce to accommodate dietary preferences without compromising flavor.
- Make-ahead: The sauce can be prepared up to 2 days in advance and gently reheated. fry the chicken fresh for the best crispy texture.
- Visual appeal: Use bright red and green bell peppers, and garnish with thinly sliced green onions or sesame seeds for a vibrant finish.
Serving Suggestions
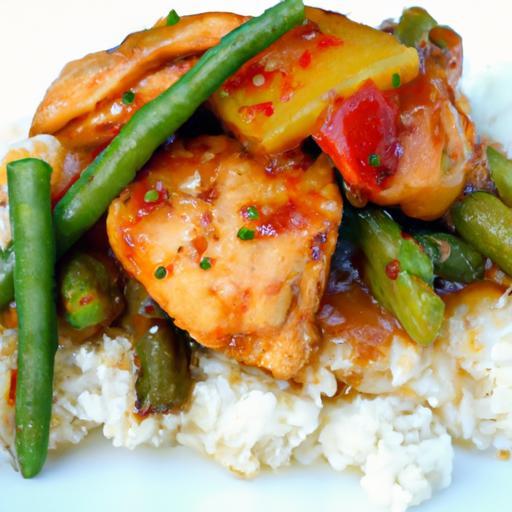
present this irresistible dish over a bed of fluffy steamed jasmine rice or fragrant coconut rice for a comforting meal. A side of steamed broccoli or snap peas adds freshness and crunch. Garnish with toasted sesame seeds and freshly chopped scallions to elevate both aroma and aesthetic. For an extra touch, a wedge of lime on the side livens up the palate with a fresh citrus squeeze.

Nutritional Data (Per Serving)
| Calories | Protein | Carbohydrates | Fat |
|---|---|---|---|
| 450 kcal | 35 g | 40 g | 15 g |
For more inspiration on Asian-style dishes that complement this meal, check out our Easy Teriyaki Chicken Recipe. Additionally, learn about the science behind frying perfectly crispy dishes on this Serious Eats guide.
Q&A
Q&A: The Ultimate Easy Sweet and sour Chicken Recipe Unveiled
Q1: What makes this sweet and sour chicken recipe “ultimate” and easy?
A1: This recipe strikes the perfect balance between simplicity and flavor. It uses everyday ingredients you likely already have, requires minimal prep time, and skips complicated techniques-yet delivers restaurant-quality sweet and sour chicken with a deliciously crispy coating and a tangy, vibrant sauce.
Q2: Can I use boneless chicken thighs rather of breasts?
A2: Absolutely! Boneless chicken thighs bring a juicy, tender alternative with richer flavor and can make the dish even more succulent. Just adjust the cooking time slightly for even doneness.
Q3: What’s the secret to achieving that perfect crispy texture on the chicken?
A3: The trick lies in coating the chicken pieces with a simple batter or cornstarch dredge and frying them in hot oil just until golden brown-this creates a light, crunchy exterior that holds up beautifully under the glossy sweet and sour sauce without becoming soggy.
Q4: How can I make the sweet and sour sauce taste balanced and vibrant?
A4: The magic is in combining tangy vinegar with the right amount of sweetness from sugar or pineapple juice, complemented by soy sauce for umami depth, and a touch of ketchup or tomato paste for color and subtle sweetness. Fresh ginger and garlic add aromatic warmth.Adjust these ingredients gradually to suit your taste.
Q5: are there easy substitutions for pineapple if I don’t have canned?
A5: Fresh pineapple chunks work wonderfully in place of canned, adding natural sweetness and a juicy bite. If pineapple isn’t available, mango or even apple pieces can lend a creative twist while maintaining the sweet and tangy profile.
Q6: Can this dish be made healthier or baked instead of fried?
A6: Yes! For a lighter version, toss the chicken pieces in a bit of oil and bake them on a wire rack at a high temperature until crisp. While the texture differs slightly from frying, the sauce still shines, and you get a delightful, less oily meal.
Q7: What side dishes pair best with sweet and sour chicken?
A7: Steamed jasmine rice or fragrant coconut rice is a classic and perfect base to soak up the tangy sauce. Stir-fried veggies or a fresh cucumber salad also complement the dish with contrasting textures and freshness.
Q8: How can I store leftovers and reheat without losing flavor or texture?
A8: Store refrigerated leftovers in an airtight container for up to 2 days.To reheat, warm the chicken and sauce gently in a skillet over medium heat to maintain crispiness in the chicken coating. Avoid microwaving straight from the fridge, as it often leads to sogginess.
Q9: Is this recipe adaptable for meal prepping?
A9: Definitely! Keep the fried chicken and sauce separate until mealtime to preserve crispness. Portion out with rice and veggies into containers for swift, flavorful lunches or dinners throughout the week.
Q10: Can kids enjoy this dish? Is it too spicy?
A10: This recipe is naturally mild but full of sweet and tangy flavors, making it very kid-kind. You can adjust the vinegar and sugar ratios to tone down any sharpness or add a dash of mild chili sauce for grown-up taste buds.
in Conclusion
With every crispy bite and tangy twist, this ultimate easy sweet and sour chicken recipe proves that homemade takeout can be both effortless and extraordinary.Whether you’re a seasoned cook or a kitchen newbie, the vibrant flavors and simple steps are here to transform your mealtime routine. So next time the craving strikes, remember: delicious, balanced, and perfectly saucy chicken is just a stir away. Happy cooking-and even happier eating!